The eeePC 1005 is still a nice little netbook. Despite owning an iPad and them apparently being all the craze, I still prefer being productive on my eeePC.
However if you’ve got one, its likely getting a bit long in the tooth by now.
Getting BIOS setting errors on each boot up of your eeePC? If it’s asking you to reload setup defaults by pressing F2 every time you turn it on, it’s probably time to replace the CMOS backup battery.
With a hefty disclaimer of me not being responsible for anything you do or don’t do… here’s how:
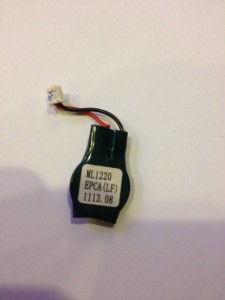
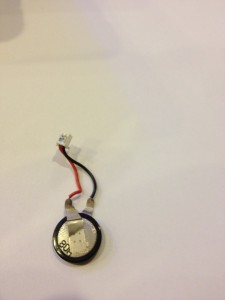
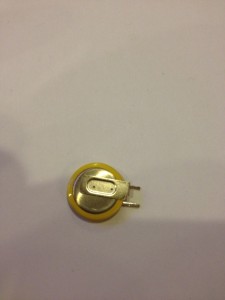
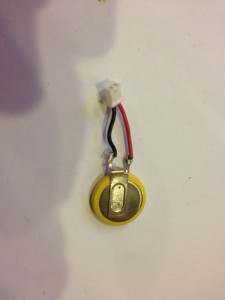
First buy a replacement battery. It is an ML 1220 3V rechargeable button battery. eBay or Amazon will be your best bets. If you can get one with metal contacts pre-soldered to the battery, it will make your life easier. Don’t get a CR1220 — those are non-rechargeable.
When ready, it’s time to open up the eeePC.
1. Unplug the eeePC and remove the main battery.
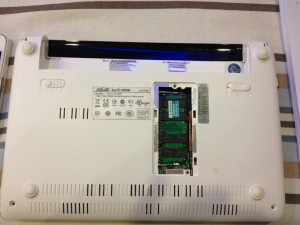
2. Turn the netbook upside down and remove the four Philips screws, one in each corner. Unscrew the memory flap on the bottom to find a fifth screw inside. Unscrew that too.
3. Turn the netbook right-side up and flip open the screen. You need to separate the keyboard from the body. It is held on with small plastic clips along the top side. Use a small plastic spudger tool or (gently) use a small flat-head screwdriver and slide it along the top gap between the keyboard and the body. There are about five clips.
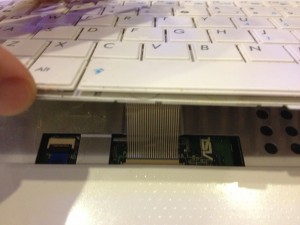
5. Once the clips are released, the keyboard will slide upward. It is still connected near the bottom by a ribbon cable. Gently use a small flat-head screwdriver to flip open the black latch holding the cable to the mainboard, release the cable and remove the keyboard.
6. Now it’s time to begin removing the top shell of the netbook. Remove the five screws you can see. One is underneath the “Warranty void if broken or removed” sticker. There’s no way your eeePC is still in warranty. (If it were, you should know you can easily buy tamper-resistant “Warranty void if broken” stickers on eBay). Once the screws are removed, gently release the touchpad ribbon cable before going any further. Again, a small flat-head screwdriver prying on each side of the black clip will release it.
7. Release the top shell by sliding your plastic tool or a small flat-head screwdriver between the two shell halves along the front. Again there are 5 or 6 clips. You only need to go along the front… The entire top half will separate once the clips are released. It will come away since the touchpad cable is disconnected.
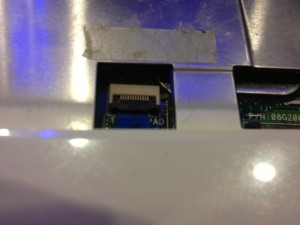
8. The battery is on the lower left-hand corner of the mainboard, probably peeping out from behind a wireless module that is taped to the top of the board, just below the big fan. The battery is wrapped in dark green heatshrink plastic, and clips to the mainboard using a white connector.
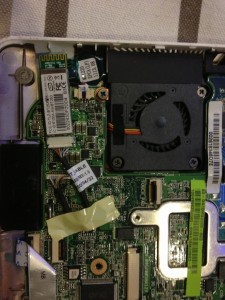
The eeePC is finally open. The backup battery is hiding on the lower left of the netbook (top of this photo, to the left of the fan).
9. Carefully unstick the wireless module and move it out of the way. Then use small needle-nosed pliers to carefully unplug the white plastic plug connecting the battery. You can cut away the green heatshrink material to expose the battery underneath. If you test the voltage across the battery, you should see significantly less than 3V. Mine was down to under 1V.
10. Snip off the black and red wires as close to the battery as possible, and strip and carefully solder them onto the terminal clips of your new battery.
Bear in mind that soldering to lithium batteries isn’t the safest of things you will ever do. Lithium batteries aren’t all that friendly, and can catch fire or explode very violently. If your battery doesn’t have terminals pre-welded to it, if you are cack-handed or only have a cheap non-temperature controlled iron, skip soldering and just use electrical tape. Just be sure to clean the battery thorough and fasten the wire well enough to ensure it won’t move and potentially short out the battery, causing another potentially amusing fire at a later date.
If there are no terminals, solder the wires onto small pieces of broken paperclip coils wound into mini single-turn springs, place these springs on each side of the battery, ensuring they don’t touch or short out the battery, and tape around the battery tightly. The compression should make a good connection.
If yours does have terminals, then go ahead and solder, but use the “heatsink trick”: To sink heat away from the battery when soldering, use needle-nosed pliers to grasp the battery terminal between where you are soldering and the battery. As the metal of the pliers acts as a much larger heat reservoir than the battery, a lot of the heat will travel into the pliers rather than into the battery. Also, solder quickly, wear eye protection, keep your head back and flammable materials away, and use an aforementioned decent temperature-controlled soldering iron. If you, or any part of you or your property, family, friends or pets does decide to go on fire or otherwise get hurt as a result of this article: tough luck, I warned you I would take no responsibility ![]()
Make sure you solder or tape the right way round: Red to the + terminal and black to the -.
11. Once soldered or taped, use electrical tape to wrap the battery and terminals, so that no metal parts are exposed. Make sure there is no way the two terminals can ever touch themselves or anything else.
Then clip it back to the mainboard (make sure you clip it the right way round — don’t force it in the wrong way. Mine had a pen mark on the top to show which way was “up”) stick back the wireless module, and reassemble the netbook in reverse order. Be careful when re-seating the ribbon cables — wiggle them left and right to seat them as far as possible before re-engaging the clips with your other hand.
Tadaaa… Done. Extra points if you have an anonymous screw left over after putting it back together.
You should now no longer have to reload BIOS defaults on every boot. The CMOS backup battery should be good for another three to five years.

Most important thing to be kept in mind when working with soldering iron is not to touch the tip of the iron as it is extremely hot. Soldering material used for the purpose is an alloy of tin and lead and is called flux. Before you put solder over the required area, heat up the surface to be soldered by touching the tip of the hot iron. Application of the solder is called “tinning”since percentage of tin is more in the flux. However, flux can be of various types depending upon the things to be soldered. ”
Look out for our own homepage as well
<="http://www.caramoan.ph/caramoan-hunongan-cove/
You are my inspiration , I have few blogs and sometimes run out from to publish .
I’ve observed that on-line training is getting common because attaining your college degree online has turned right into a well-liked selection for many people. Many people have not really had a possible opportunity to attend a conventional college or university nonetheless look for the raised earning potential and career advancement that a Bachelor Degree offers you. Nonetheless people might possess a degree in 1 program but would wish to pursue anything they already have an curiosity in.
Great publish. I was checking continuously this blog and I am impressed! Extremely helpful info specifically the last component I care for this kind of information much. I was looking for this particular info for a lengthy time. Thank you and very best of luck.
Wow, marvelous weblog format! How lengthy have you been running a blog for? you made running a weblog look easy. The full look of your web website is fantastic, as well as the content material!
Eee PCs are great!
For things like Arduino programming “in the field” there is nothing like them. I was writing a specialized GPS program that was collecting data and found a logical bug with the code that I could fix on the spot.
Other laptops would work but mine is 100% solid state, tiny and still something that you can know almost everything about.
Thank you so much for taking the time and trouble to produce this guide. Helped me replace the battery and fix the annoying time issue.
Loved the way you wrote the article as well. Cheers.
Thanks for this! I’ve rebooted my trusty netbook twice and so far, so good. I’ve never opening up my ASUS before and I’m glad I didn’t screw anything up with your guidance! I just had to go in and secure the track pad ribbon better because it wasn’t working on the first reboot. Thanks again!
Excellent tutorial, thank you!
OMG! Thank you so much!! Worked like a charm. I’m so glad to have my little eee PC start right up. Thank you
Amazon.com now carries a 3v ML 1220 with the wires and plug already attached. Wasn’t really looking forward to soldering mine together with my propane torch.
Thanks for the great instructions.
Is it possible, instead using the ML1220 battery, to install a CR2032 non rechargeable?
thanks for the excellent guide. followed it exactly, i got away without unclipping the touchpad ribbon for what that’s worth. bought a battery (in casing with wire etc) from amazon for pretty cheap too. easier than any soldering i felt
This versatility works as it permits changeover in between various tenancies.
my blog (Direct Line Landlord Insurance|Direct Line Buy To Let Insurance|Direct Line Property Manager Insurance)
Because the admin of this web page is working, no doubt very soon it will be
famous, due to its feature contents.
Great info. Lucky me I recently found your
website by accident (stumbleupon). I’ve saved as a favorite for later!
Greetings, I was just taking a look at your site and filled out your “contact us” form. The feedback page on your site sends you these messages to your email account which is why you’re reading my message at this moment right? This is half the battle with any type of advertising, making people actually READ your ad and I did that just now with you! If you have an advertisement you would like to blast out to tons of websites via their contact forms in the U.S. or anywhere in the world send me a quick note now, I can even target your required niches and my costs are very low. Send a reply to: trinitybeumer@gmail.com